Flood Damage Checklist: What to Do in the First 72 Hours in Colorado Springs
The first 72 hours after a flood determine whether your home recovers or develops mold. This step-by-step checklist tells you exactly what to do — and what not to do — after water damage in Colorado Springs.

Flood Damage Checklist: What to Do in the First 72 Hours in Colorado Springs
Water damage is one of the most stressful things a homeowner can face. Whether it's a burst pipe, a backed-up sewer, a failed water heater, or a flash flood from one of Colorado's intense summer storms — the clock starts ticking the moment water enters your home.
Here's the hard truth: mold can begin growing within 24 to 48 hours of water intrusion. The decisions you make in the first 72 hours determine whether your home recovers fully or develops a mold problem that costs tens of thousands of dollars to remediate.
This checklist is designed for Colorado Springs homeowners. Follow it step by step.
Before You Do Anything: Safety First
Do not enter a flooded area until you've confirmed it's safe.
Electrical Safety
- Turn off electricity to the affected area at the breaker box — before entering standing water
- If the breaker box is in the flooded area, call an electrician before entering
- Never use electrical appliances in wet areas
- Do not use a regular vacuum to remove water — use a wet/dry vac only
Structural Safety
- Check for sagging ceilings before entering — a water-saturated ceiling can collapse
- Watch for warped or buckled floors that may be unstable
- If you smell gas, leave immediately and call your gas company from outside
Contamination Safety
- Category 1 water (clean water from a broken pipe or supply line) is relatively safe
- Category 2 water (gray water from appliances, dishwashers, washing machines) contains contaminants — wear gloves and boots
- Category 3 water (black water from sewage backup, flooding from outside, or standing water over 48 hours) is highly contaminated — wear full protective gear including N95 mask, gloves, and eye protection
Hour 0 to 4: Stop the Water and Document Everything
Step 1: Stop the Water Source
- Shut off the main water supply if the source is a broken pipe or appliance
- If the source is external flooding (storm, flash flood), you may not be able to stop it — focus on protecting what you can
- Call a plumber immediately if you can't identify or stop the source
Step 2: Document Everything Before Touching Anything
This step is critical for insurance claims and is often skipped in the panic of the moment.
- Take photos and video of everything — every room, every damaged item, every wall, every floor
- Photograph water levels on walls
- Document all damaged furniture, appliances, and personal property
- Note the time and date on your documentation
- Do not throw anything away before documenting it — even ruined items may be needed for insurance claims
Step 3: Call Your Insurance Company
- Report the claim immediately — most policies require prompt notification
- Ask specifically about emergency services coverage — many policies cover emergency water extraction and drying
- Ask whether you need to wait for an adjuster before beginning cleanup (in most cases, you don't — document first, then act)
- Get a claim number and the adjuster's contact information
Step 4: Call a Water Damage Restoration Professional
Don't wait to call a professional. The sooner extraction and drying begins, the better the outcome.
At Absolute Floors & More, we respond to water damage emergencies throughout Colorado Springs and the surrounding area. Call us at (719) 896-6274 — we'll assess the damage and begin extraction as quickly as possible.
Hour 4 to 12: Begin Water Removal
Step 5: Remove Standing Water
- Use a wet/dry vacuum to remove standing water
- If water is more than 2 inches deep, you may need a submersible pump (available at hardware stores or from a restoration company)
- Work from the outside of the affected area toward the drain or exit point
- Remove water from carpets, but understand that carpet padding absorbs water like a sponge — surface extraction is not enough
Step 6: Remove Wet Items
- Remove wet rugs, furniture, and personal items from the affected area
- Move furniture to a dry area or outside if weather permits
- Prop up furniture on blocks or aluminum foil to prevent rust stains on carpet
- Remove wet cushions and upholstery and stand them on edge to dry
Step 7: Begin Carpet Assessment
- Lift a corner of the carpet to check the padding
- If the padding is saturated, it almost certainly needs to be replaced — wet padding holds moisture for days and is a primary mold source
- Carpet itself may be salvageable if it's Category 1 water and drying begins within 24 hours
- Category 2 or 3 water contamination typically requires carpet replacement
Hour 12 to 24: Aggressive Drying Begins
Step 8: Maximize Air Movement
- Open windows and doors if outdoor humidity is lower than indoor humidity (check weather — don't open windows during rain or high humidity)
- Set up fans to create cross-ventilation — air movement is critical for drying
- Position fans to blow across wet surfaces, not just into the room
- Rent commercial air movers if the affected area is large (available at equipment rental stores)
Step 9: Run Dehumidifiers
- Dehumidifiers are essential — they remove moisture from the air that evaporates from wet materials
- Consumer dehumidifiers work for small areas; rent commercial units for larger spaces
- Empty dehumidifier tanks frequently or connect a drain hose
- Target indoor relative humidity below 50% — ideally 30 to 40%
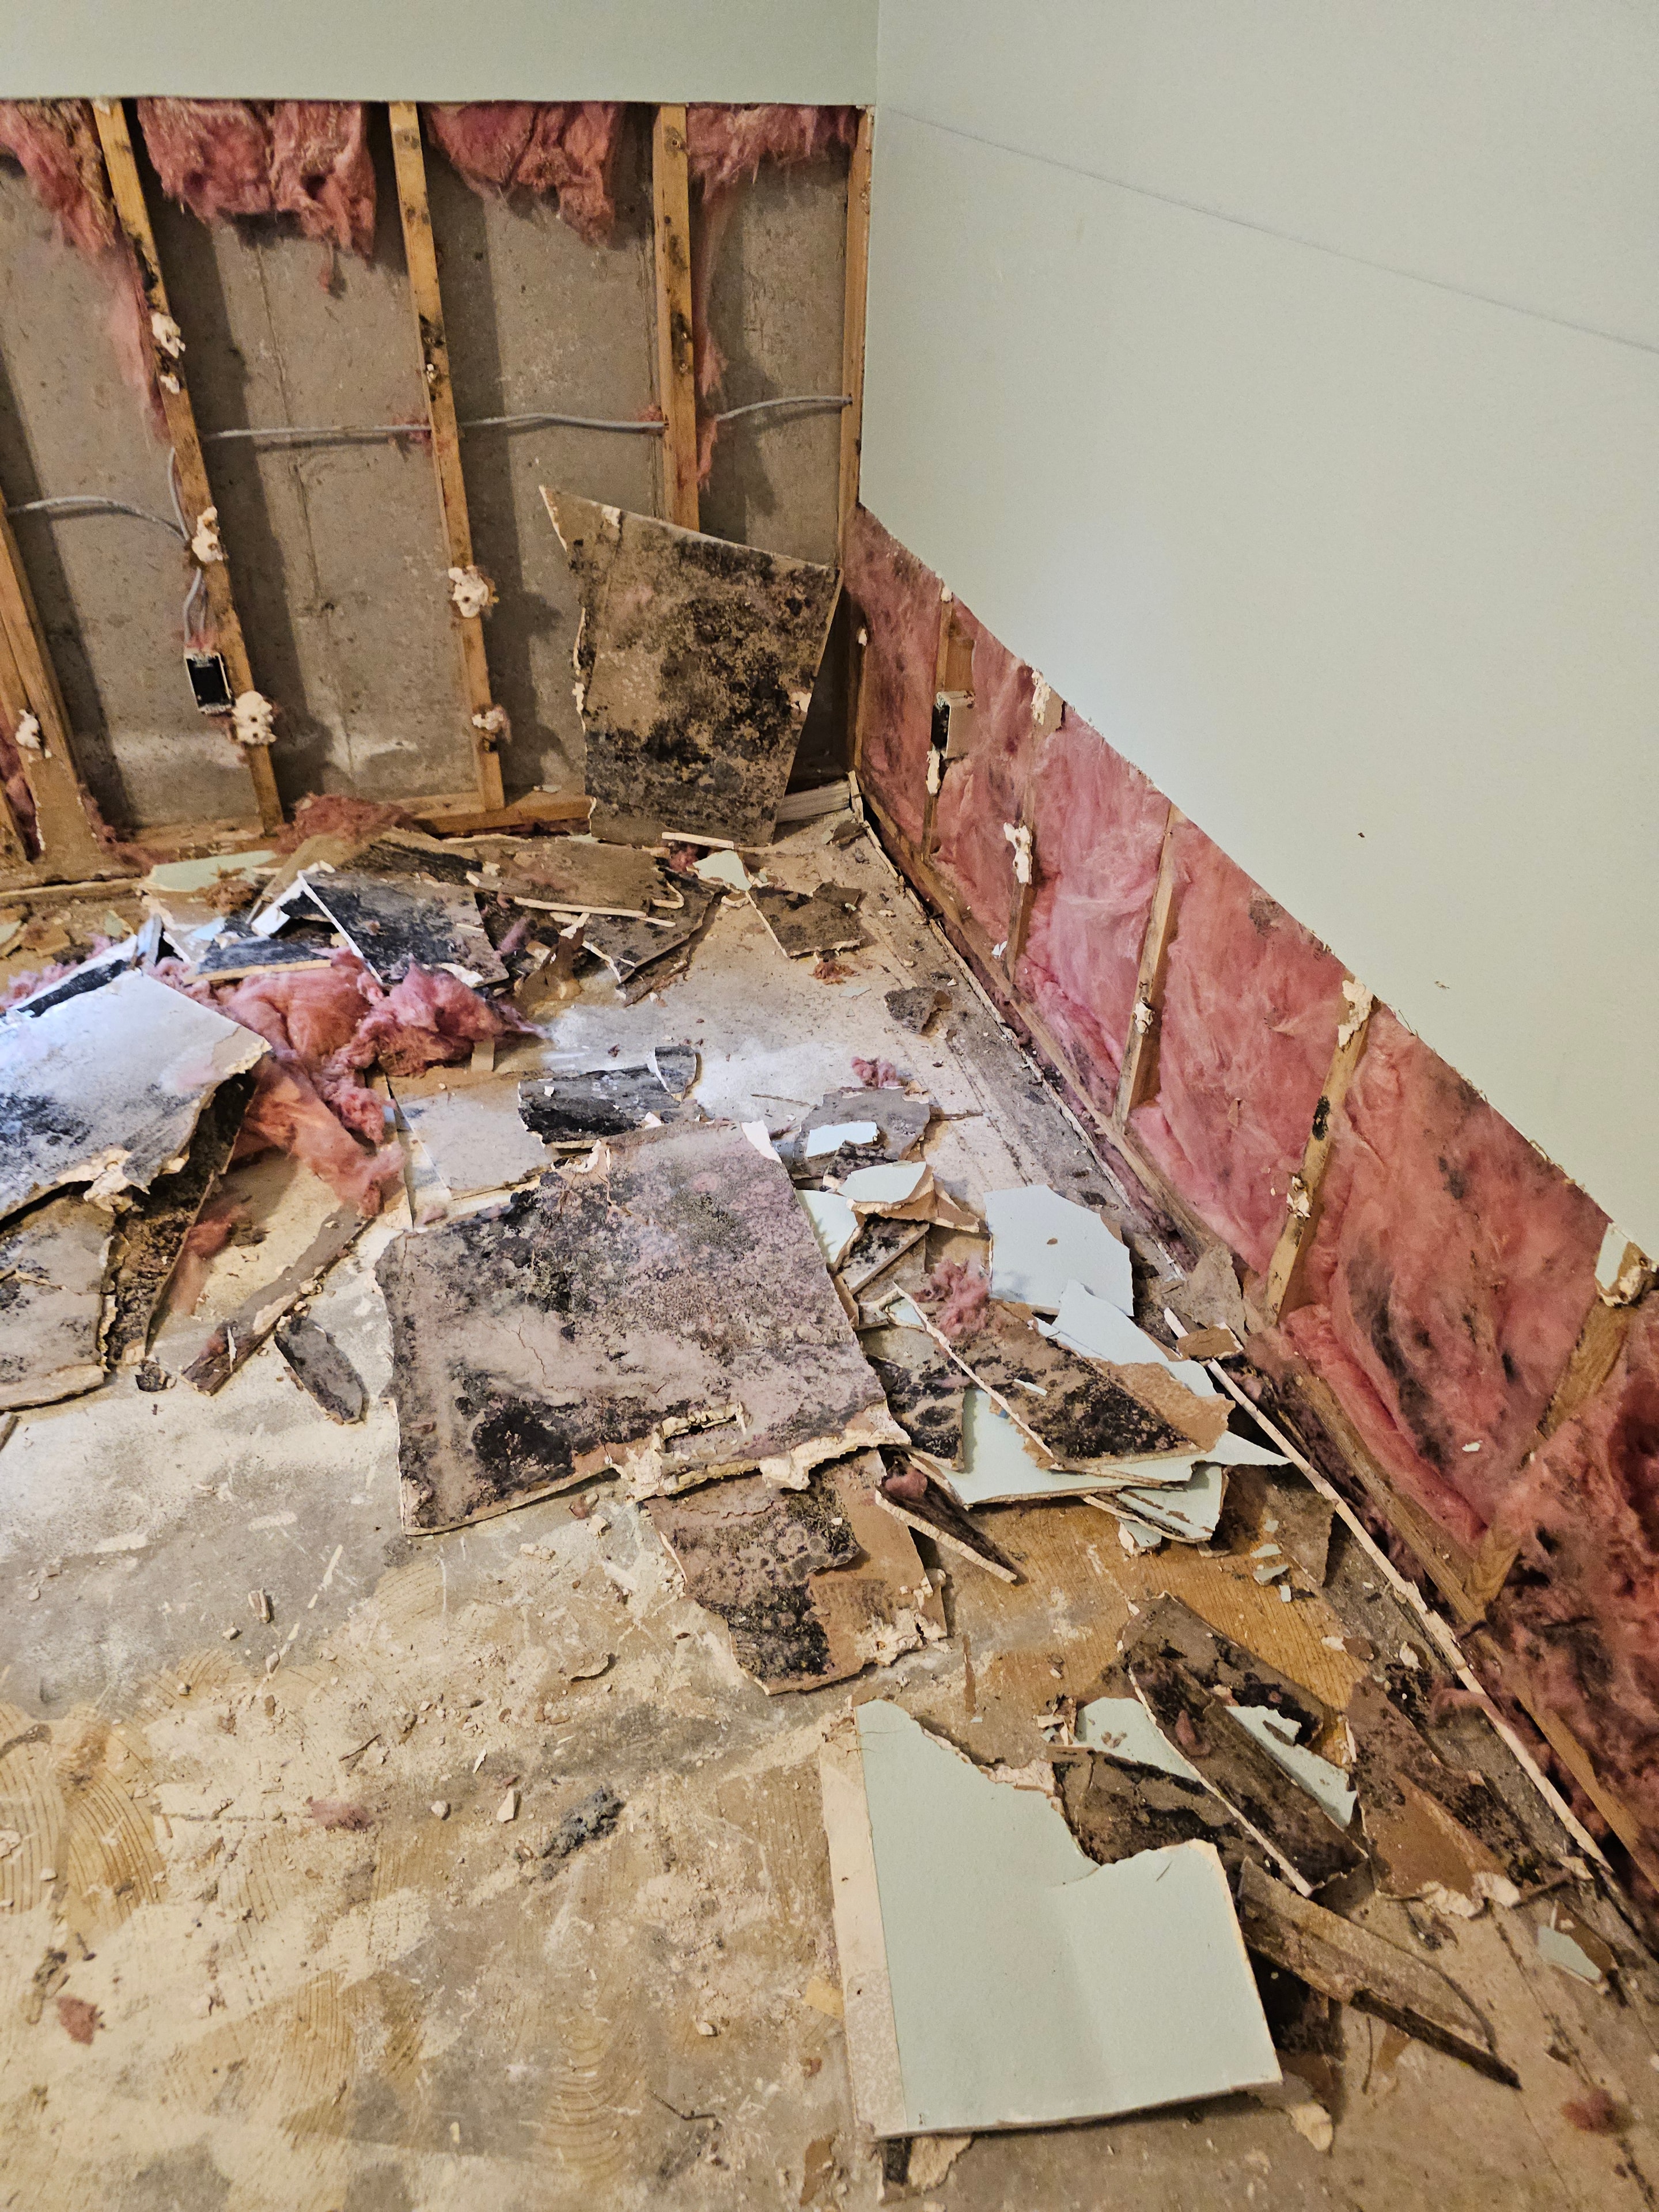
Step 10: Remove Wet Drywall and Insulation
This is the step most homeowners are reluctant to take — but it's critical.
Drywall is highly absorbent and wicks water up from the floor. Wet drywall that isn't dried within 24 to 48 hours will develop mold inside the wall cavity. The mold is invisible from the outside until it's extensive.
- Cut drywall 12 inches above the highest water line
- Remove wet insulation — it cannot be dried and must be replaced
- Allow wall cavities to dry completely before closing them up
- This is a situation where professional assessment is valuable — a moisture meter can tell you exactly how far the water has wicked up the wall
Step 11: Check Under Cabinets and Behind Appliances
Water travels. Check:
- Under kitchen and bathroom cabinets (the toe kick area is a common water trap)
- Behind the refrigerator, dishwasher, and washing machine
- Inside cabinets — water can wick up cabinet sides
- Under the water heater
Hour 24 to 48: Monitor and Continue Drying
Step 12: Monitor Moisture Levels
- Use a moisture meter to check drywall, subfloor, and framing
- Drywall should read below 15% moisture content before closing up walls
- Wood subfloor should read below 12% moisture content
- Continue drying until all readings are in the safe range
Step 13: Treat for Mold Prevention
- Apply an antimicrobial solution to all affected surfaces — walls, subfloor, framing
- This is a preventive measure, not a substitute for proper drying
- Do not close up walls or install new flooring until moisture readings confirm the structure is dry
Step 14: Assess Carpet and Flooring
- If carpet has been wet for more than 24 hours, mold risk is significant — professional assessment is needed
- Hardwood floors that have been wet for more than 24 hours will likely cup and buckle — professional drying with specialized equipment may save them
- Laminate flooring almost always needs replacement after flooding — it swells and delaminates
Hour 48 to 72: Professional Assessment and Remediation
Step 15: Professional Moisture Mapping
A professional restoration company will use moisture meters and thermal imaging cameras to map all wet areas — including areas you can't see, like inside walls and under flooring. This is the only way to confirm that drying is complete.
Step 16: Carpet and Pad Decision
By 48 to 72 hours, the decision on carpet needs to be made:
- Category 1 water, drying began within 24 hours: Carpet may be salvageable with professional extraction and drying
- Category 1 water, drying delayed beyond 24 hours: Carpet is likely contaminated with mold — replacement recommended
- Category 2 or 3 water: Carpet replacement is almost always required
Padding almost always needs replacement regardless of water category — it's too absorbent to dry reliably and too inexpensive to risk mold contamination.
Step 17: Subfloor Treatment
If the subfloor was wet:
- Wood subfloor: treat with antimicrobial, dry thoroughly, check for structural damage
- Concrete subfloor: clean, treat with antimicrobial, allow to dry completely before installing new flooring
- If mold is already visible on the subfloor, professional mold remediation is required before any new flooring is installed
Colorado Springs-Specific Flood Risks
Flash Flooding
Colorado Springs is in a flash flood zone. The Front Range terrain channels water rapidly during intense summer thunderstorms. Flash floods can send water into basements and lower levels with very little warning.
Prevention: Ensure your home's grading directs water away from the foundation. Keep window wells clear. Consider a battery-backup sump pump for basements.
Pipe Freezing
Colorado Springs winters can be severe, and frozen pipes are a significant water damage risk. Pipes in exterior walls, crawl spaces, and garages are most vulnerable.
Prevention: Insulate exposed pipes. Keep cabinet doors under sinks open during cold snaps. Know where your main water shutoff is.
Monsoon Season
July and August bring Colorado's monsoon season — afternoon thunderstorms that can drop significant rainfall in short periods. Homes with poor drainage or aging roofs are vulnerable.
Prevention: Clean gutters before monsoon season. Check roof condition annually. Ensure downspouts direct water at least 6 feet from the foundation.
Snowmelt
Spring snowmelt can cause basement flooding, especially in older Colorado Springs neighborhoods where drainage infrastructure is aging.
Prevention: Check sump pump operation before spring. Ensure the sump pit is clear and the float switch is working.
What Not to Do After a Flood
Don't use a regular household vacuum — it's not designed for water and creates an electrocution risk.
Don't run the HVAC system until it's been inspected — wet ductwork spreads mold spores throughout the home.
Don't use fans to dry wet drywall without also running dehumidifiers — fans evaporate moisture into the air; without dehumidifiers, that moisture just resettles on other surfaces.
Don't paint over wet drywall — moisture trapped behind paint causes bubbling, peeling, and mold.
Don't throw away damaged items before documenting them for insurance.
Don't wait to call a professional — every hour of delay increases mold risk and restoration cost.
When to Call Absolute Floors & More
We specialize in water damage restoration and carpet restoration throughout Colorado Springs, Fountain, Monument, Pueblo, and the surrounding 50-mile radius. We can help with:
- Emergency water extraction
- Carpet and upholstery drying and restoration
- Carpet and pad replacement after flooding
- Subfloor assessment and treatment
- Coordination with your insurance company
We're IICRC certified in water damage restoration, veteran owned, and have been serving the Pikes Peak region since 2014.
Call us 24/7 for water damage emergencies: (719) 896-6274
The sooner you call, the better your outcome. Don't wait.
Explore Topics
Written by
Nate Lemieux
Content creator and writer sharing insights and stories.